Thread
Iron
Sewing machine set on straight stitch
"pretty" fabric for front of bag
"lining" fabric
two strips for handles.
Instructions....
Cut x2 rectangles of "pretty" fabric for the outside of the bag 36cm x 42 cm
Cut x2 rectangles of plain fabric for the inside of the bag 36cm x 42cm
Cut x2 strips of fabric for the straps 12cm x 68cm long.
Place the two "pretty" sides together and sew the two long sides and the bottom using a straight stitch ensuring the pattern is the right way up.
Do the same for the lining. You will have two half bags that look like this....
iron your handles flat
Fold 1cm from the edge and press fold firm the entire length of fabric like this.
Repeat and do on the other side like this....
fold in half and press again so both edge folds are tucked in the inside.
stitch the open side closed with your machine and repeat with the second handle.
You should then have this.....
Then turn "pretty" fabric right side out and slide other bag inside. If you look at it the pretty side will be on the outside and all the messy seams will be between the two bags, therfor making the "neat" sides on display on both the outside and the inside of the bag.
Fold the entire top raw edge of the outer bag about 2cm and iron the fold firm all the way around. Repeat for the process for the inner bag. Make sure all the "messy" seams stay on the inside.
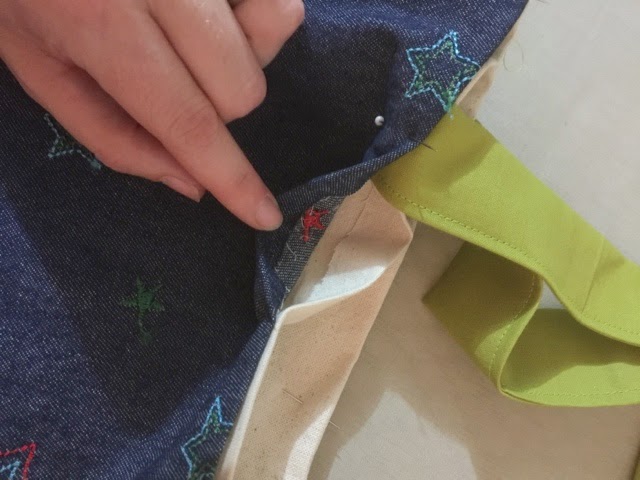
Measure where you want handles to be and pin them in place like this....
Pin the top of the bag and handles in place securely all the way around and zip around with machine.
The top will look like this...
And it's done!
Chose your a fabric related to something they love and it makes a great little home made gift. I have used off cuts for all the bags I have made, but you could easily add applique or embroidery. You could use a thrifted pillowcase or anything that takes your fancy! If your a beginner sewer I highly recommend a project like this, it will boot your confidence no end.
Hope you have a lovely weekend!
Xx


![Ronaldo Fernandes feat. Anderson Mário - Tás A Confundir (Zouk) [Download mp3]](https://blogger.googleusercontent.com/img/b/R29vZ2xl/AVvXsEhEoBxA4KTbH3jhXOp_JTlLcALXrHmnDrW5lGB2GA-oXxb06JLRRq2mQoyKfS9XDYiZfpNNbLnTG0KyGZ-i7he-xjHA1ckDR53xGNgejHaWquiAV1VLOIxx6zNGwuR8D-0rBgIJgTtaij8/w100/Ronaldo+Fernandes+-+T%25C3%25A1s+a+Confundir+%2528feat.+Anderson+M%25C3%25A1rio%2529.JPG)

0 Yorumlar